Building a deck can be a fun and rewarding project, but it can also be a daunting task if you don’t know where to start. With so many materials, designs, and construction methods to choose from, it can be tough to determine the best way to build a deck. However, by taking the time to research and plan, you can create a beautiful and functional outdoor living space that will add value to your home and provide years of enjoyment. In this article, we’ll explore some of the most effective ways to build a deck, from choosing the right materials to creating a strong foundation. So whether you’re a seasoned DIYer or a beginner, read on to discover the best ways to build a deck that will stand the test of time.
The most effective way to build a deck is to start with a solid foundation. This means properly preparing the area where the deck will be built, including clearing the site and ensuring that the ground is level and stable. Next, it’s important to choose the right materials for the deck, including the deck boards, railing, and any posts or supports. It’s also important to carefully plan the layout of the deck, taking into account the desired size, shape, and any potential obstacles or hazards. Finally, it’s important to carefully follow all safety guidelines and regulations when building a deck, including proper footing and support, and ensuring that the deck is properly anchored to the house or other structure. With proper planning and execution, a deck can be built effectively and safely, providing a beautiful and functional outdoor living space.
Step 1: Determine Your Budget
Calculate the Costs
Before beginning any construction project, it is important to determine a budget and stick to it. This includes calculating all costs associated with building a deck, such as materials, labor, and any necessary permits or inspections.
To accurately calculate the costs of building a deck, it is important to consider the size of the deck, the type of materials used, and any additional features or design elements. For example, a larger deck will require more materials and labor than a smaller deck, and a deck with a complex design may require more skilled labor and specialized materials.
It is also important to factor in any additional costs, such as landscaping or hardscaping, that may be necessary to complete the project. By accurately calculating the costs of building a deck, homeowners can ensure that they have enough funds to complete the project and avoid any unexpected expenses.
In addition to calculating the costs of materials and labor, it is also important to consider the cost of any necessary permits or inspections. Depending on the location and size of the deck, there may be local building codes or regulations that must be followed, which can add additional costs to the project.
Overall, accurately calculating the costs of building a deck is essential to ensuring that the project stays within budget and is completed successfully. By considering all necessary costs and factors, homeowners can avoid any unexpected expenses and ensure that their deck is built to their satisfaction.
Allocate Your Budget
When it comes to building a deck, one of the most important factors to consider is your budget. This is because a deck can be a significant investment, and you want to make sure that you allocate your funds wisely. Here are some tips for allocating your budget when building a deck:
- Prioritize Quality Materials: One of the most important factors in the cost of building a deck is the materials you use. While it may be tempting to save money by using cheaper materials, this can end up costing you more in the long run. Instead, prioritize quality materials that will last longer and require less maintenance over time.
- Consider Labor Costs: In addition to the cost of materials, you’ll also need to consider labor costs. The cost of labor will depend on a variety of factors, including the size of your deck, the complexity of the design, and the location of your home. Make sure to get quotes from multiple contractors to ensure that you’re getting a fair price.
- Don’t Skimp on Permits: Building a deck may require permits from your local government, and these permits can come with a cost. However, skimping on permits can end up costing you more in the long run if you’re caught without them. Make sure to factor in the cost of permits when allocating your budget.
- Include Maintenance Costs: While the initial cost of building a deck is important, it’s also important to consider the long-term maintenance costs. Different materials require different levels of maintenance, and some materials may require more frequent maintenance than others. Make sure to include maintenance costs in your budget to ensure that you’re able to maintain your deck over time.
By following these tips, you can allocate your budget effectively when building a deck. This will help ensure that you’re able to build a high-quality deck that will last for years to come.
Step 2: Choose the Right Materials
Wood Types
When it comes to building a deck, one of the most important decisions you’ll need to make is choosing the right materials. The type of wood you select will have a significant impact on the appearance, durability, and overall performance of your deck. Here are some of the most common wood types used for deck construction:
Cedar
Cedar is a popular choice for deck building due to its natural beauty and resistance to rot and insect damage. It is also relatively lightweight, making it easy to work with and transport. However, cedar is a softwood, which means it may scratch or dent more easily than other types of wood.
Redwood
Redwood is another popular choice for deck building, known for its natural beauty and resistance to rot and insect damage. It is also a softwood, like cedar, but it is slightly harder and more durable. Redwood is also more resistant to scratches and dents than cedar.
Pressure-Treated Wood
Pressure-treated wood is a popular choice for deck building due to its affordability and durability. It is made by adding chemicals to the wood to make it more resistant to rot and insect damage. Pressure-treated wood is typically made from southern yellow pine, which is a hardwood that is resistant to warping and cracking.
Tropical Hardwoods
Tropical hardwoods, such as Ipe, Teak, and Cumaru, are becoming increasingly popular for deck building due to their natural beauty and durability. These woods are extremely dense and resistant to rot, insect damage, and warping. They are also more expensive than other types of wood, but they can last up to 50 years or more with proper maintenance.
Engineered Woods
Engineered woods, such as composite and PVC, are becoming increasingly popular for deck building due to their low maintenance requirements and long lifespan. Composite decking is made from a combination of wood fibers and plastic, while PVC decking is made from a mixture of PVC and wood fibers. Both types of decking are resistant to rot, insect damage, and warping, and they require minimal maintenance over their lifespan.
Choosing the right wood type for your deck will depend on your personal preferences, budget, and the climate in your area. It’s important to consider factors such as durability, maintenance requirements, and cost when making your decision.
Fasteners and Hardware
Choosing the right fasteners and hardware is crucial for building a sturdy and long-lasting deck. There are various types of fasteners and hardware available, and it is important to select the appropriate ones based on the type of deck and the materials used.
One of the most common types of fasteners used in deck building is deck screws. These screws are designed specifically for deck construction and are made from high-quality materials that can withstand the elements. They are also designed to be countersunk, which means that they can be installed flush with the surface of the deck, providing a smooth and even surface.
Another important type of hardware for deck building is the joist hanger. Joist hangers are used to support the deck’s framing and provide a solid foundation for the deck’s surface. They are available in various sizes and styles, and it is important to choose the right size and style based on the size and spacing of the deck’s framing.
It is also important to use high-quality hardware made from corrosion-resistant materials such as stainless steel or galvanized steel. This will ensure that the hardware lasts as long as the deck itself and does not corrode or rust over time.
In addition to these fasteners and hardware, it is also important to use appropriate connectors, such as post-to-beam connectors, to provide additional support and stability to the deck’s framing.
Overall, choosing the right fasteners and hardware is essential for building a strong and durable deck. It is important to select high-quality materials that are designed specifically for deck construction and to use them in the appropriate sizes and configurations based on the type of deck and the materials used.
Stain or Sealant
When it comes to protecting and enhancing the appearance of your deck, choosing between a stain or a sealant can be a tough decision. Both options have their own unique benefits and drawbacks, so it’s important to understand the differences between them before making a decision.
Stain
A deck stain is a penetrating sealer that is designed to deeply penetrate the wood fibers of your deck, providing long-lasting protection against the elements. Stains come in a variety of colors, from natural wood tones to bold, vibrant shades, and can be applied with a brush, roller, or sprayer.
One of the main benefits of using a deck stain is that it allows the natural beauty of the wood to shine through, while also providing protection against UV rays, moisture, and mildew. Stains are also relatively easy to apply and can be used on a variety of deck materials, including pressure-treated wood, cedar, and redwood.
However, stains do require periodic reapplication every 2-3 years, depending on usage and exposure to the elements. They also tend to be more expensive than sealants, and may not be suitable for decks with heavy mold or mildew issues.
Sealant
A deck sealant, on the other hand, is a topcoat that forms a protective barrier on the surface of the deck. Sealants are typically made from a combination of resins, oils, and solvents, and are applied using a brush, roller, or sprayer.
Sealants are a great option for decks that are exposed to heavy foot traffic, as they provide a durable, waterproof barrier that can withstand the wear and tear of daily use. They are also relatively easy to apply and can be used on a variety of deck materials, including concrete, composite, and PVC.
However, sealants can yellow over time and may require periodic reapplication every 2-5 years, depending on usage and exposure to the elements. They can also be more difficult to repair than stains if they become damaged or scratched.
In conclusion, the choice between a stain or a sealant ultimately depends on your personal preferences and the specific needs of your deck. If you want to enhance the natural beauty of your deck while providing long-lasting protection, a stain may be the best option for you. If you need a durable, waterproof barrier that can withstand heavy foot traffic, a sealant may be the better choice.
Step 3: Plan Your Design
Measure Your Space
Measuring your space is the first step in planning your deck design. Accurate measurements will help you determine the size and shape of your deck, as well as the materials and tools you will need for construction. To measure your space, follow these steps:
- Start by measuring the length and width of your outdoor living area. Use a measuring tape or a laser measurer to get accurate results. Be sure to measure from the corners of the space, and record the measurements in a notebook or on a piece of paper.
- Take note of any obstacles or obstructions in the area, such as trees, shrubs, or other structures. These can affect the placement of your deck and the layout of your design.
- Measure the slope of the ground where you plan to build your deck. This will help you determine the angle of the deck, and whether it will need to be built on a gradient or leveled off.
- Take note of any drainage patterns in the area. Ideally, your deck should be built on level ground with good drainage to prevent water damage and erosion.
- Once you have measured your space and taken note of any obstacles or obstructions, you can begin to sketch out a rough layout of your deck design. Use graph paper or a drawing program to create a scale drawing of your deck, including the dimensions, slope, and any other features you want to include.
By taking accurate measurements of your space, you can ensure that your deck design is both functional and aesthetically pleasing.
Sketch Your Design
When it comes to building a deck, planning is crucial to ensure that the project runs smoothly and results in a beautiful, functional space. One of the first steps in the planning process is to sketch your design. Here’s why:
- Saves time and money: Sketching your design allows you to visualize the deck before you start building it. This can help you identify potential problems and make changes before you begin construction. As a result, you can save time and money by avoiding costly mistakes and rework.
- Helps you communicate your vision: A sketch can help you communicate your vision to contractors, suppliers, and other professionals involved in the project. It can also help you get buy-in from other members of your household who may have different opinions about the design.
- Helps you prioritize features: By sketching out your design, you can prioritize the features that are most important to you. For example, do you want a built-in barbecue or a hot tub? A sketch can help you decide which features are must-haves and which can be optional.
- Helps you plan for obstacles: Sketching your design can also help you plan for obstacles that may arise during construction. For example, if your deck will be built on a sloping site, you may need to include steps or a ramp. A sketch can help you plan for these obstacles and ensure that your deck is safe and accessible.
In summary, sketching your deck design is an essential step in the planning process. It can help you save time and money, communicate your vision, prioritize features, and plan for obstacles. So grab a pencil and paper, and start sketching your dream deck today!
Consider Safety Features
When it comes to building a deck, safety should always be a top priority. There are several safety features that you should consider when planning your design. Here are some of the most important ones:
- Railings: Railings are an essential safety feature for any deck. They help prevent falls and provide support for people using the deck. Make sure that your deck’s railing is at least 36 inches high and that it is properly secured to the deck’s structure.
- Footings: The footings of your deck are the support system that keep it in place. Make sure that they are properly sized and spaced to support the weight of the deck and any people using it.
- Post anchors: Post anchors are used to secure the deck’s posts to the ground. They help prevent the deck from shifting or collapsing. Make sure that the post anchors are properly installed and that they can support the weight of the deck.
- Ledger boards: Ledger boards are used to attach the deck to the house. They help stabilize the deck and prevent it from shifting. Make sure that the ledger boards are properly installed and that they are not attached too tightly to the house.
- Tie-downs: Tie-downs are used to secure the deck to the ground. They help prevent the deck from shifting or collapsing in high winds. Make sure that the tie-downs are properly installed and that they can support the weight of the deck.
By considering these safety features when planning your deck design, you can help ensure that your deck is safe and secure for years to come.
Step 4: Build the Framework
Prepare the Site
Before beginning the construction of the deck, it is essential to prepare the site where the deck will be built. This step is crucial because it ensures that the deck is built on a solid foundation, which will support its weight and ensure its longevity.
The first step in preparing the site is to clear the area of any debris, such as leaves, branches, and other obstructions. This step is important because it allows the builder to assess the site’s condition and identify any potential problems, such as uneven ground or rocks.
Once the area is clear, the builder should measure and mark the site’s boundaries to ensure that the deck is built within the specified dimensions. This step is crucial because it helps to prevent errors and ensure that the deck is built to the correct size.
Next, the builder should dig post holes for the deck’s supports. The holes should be dug to a depth of at least 30 inches, and they should be wide enough to accommodate the diameter of the posts. It is essential to dig the holes at least 8 inches deeper than the thickness of the deck’s footings to ensure that the deck is built on solid ground.
After the post holes are dug, the builder should test the soil’s stability by inserting a metal rod into each hole. If the rod is stable, it indicates that the soil is solid, and the builder can proceed with the construction of the deck’s framework. If the rod is unstable, it indicates that the soil is not solid, and the builder should consider building the deck on a different site.
Finally, the builder should check the site’s drainage to ensure that water does not accumulate around the deck’s framework. If the site has poor drainage, the builder should consider installing a drainage system to prevent water damage to the deck.
In summary, preparing the site is a crucial step in building a deck. It involves clearing the area, measuring and marking the site’s boundaries, digging post holes, testing the soil’s stability, and checking the site’s drainage. By following these steps, the builder can ensure that the deck is built on a solid foundation, which will support its weight and ensure its longevity.
Build the Footings
Before building the deck frame, it is essential to construct the footings. The footings are the foundation of the deck, and they ensure that the deck is sturdy and can withstand the weight of the deck‘s components and the people using it. The footings should be level and well-compacted to provide a solid base for the deck frame.
To build the footings, follow these steps:
- Choose the location for the footings. The footings should be placed on solid ground, away from any drainage or erosion areas.
- Determine the size of the footings. The size of the footings will depend on the size of the deck and the local building codes.
- Excavate the footings. Use a shovel or backhoe to excavate the footings to the appropriate depth.
- Build the form for the footings. The form will be used to hold the concrete in place while it cures. Use wood or concrete forms to build the form.
- Pour the concrete. Mix the concrete according to the manufacturer’s instructions and pour it into the forms.
- Compact the soil. After the concrete has cured, compact the soil around the footings to provide additional support.
It is crucial to ensure that the footings are level and well-compacted to provide a solid base for the deck frame. The footings should be inspected by a professional to ensure that they meet local building codes and are suitable for the deck’s size and design.
Build the Framing
Before starting the construction of the deck, it is crucial to have a solid and stable framework. This will provide a solid base for the deck, which will support the weight of the deck materials and ensure the deck’s stability. Building the framing is a critical step in constructing a deck, and it is essential to do it right.
To build the framing, the first step is to determine the size and shape of the deck. The size of the deck will depend on the available space and the purpose of the deck. For instance, if the deck is for a small patio, it may not require a large framework. However, if the deck is for a larger area, such as a backyard, the framework will need to be larger to support the weight of the deck materials.
Once the size and shape of the deck have been determined, the next step is to select the materials for the framing. The most common materials used for deck framing are wood, aluminum, and steel. Wood is a popular choice because it is readily available and relatively inexpensive. However, it is important to note that wood is susceptible to rot and decay, so it is essential to use treated lumber to ensure durability.
Aluminum and steel are more durable than wood and are resistant to rot and decay. They are also less expensive than wood in the long run because they do not require replacement as often. However, they can be more challenging to work with, and they may require special tools.
Once the materials for the framing have been selected, the next step is to mark the location of the framing posts. This is typically done by digging holes for the posts and then setting the posts in concrete. The holes should be dug to a depth that will ensure the posts are stable and can support the weight of the deck materials.
After the posts have been set, the next step is to install the framing members. This typically involves attaching the framing members to the posts using nails or screws. It is important to ensure that the framing members are level and square, as this will ensure the deck’s stability and prevent swaying or sagging.
In conclusion, building the framing is a critical step in constructing a deck. It is essential to select the right materials, mark the location of the framing posts accurately, and ensure that the framing members are level and square. With a solid and stable framework, the deck will be able to support the weight of the deck materials and provide a safe and secure surface for use.
Step 5: Install the Decking
Choose the Decking Material
When it comes to choosing the decking material for your deck, there are several options available. The most common options include wood, composite, and PVC. Each material has its own set of advantages and disadvantages, so it’s important to consider your needs and preferences before making a decision.
Wood
Wood is a popular choice for decking material because it is readily available, affordable, and can be easily customized to fit your preferences. However, it requires regular maintenance, such as staining or sealing, to prevent damage from the elements.
Composite
Composite decking is made from a combination of wood fibers and plastic. It is a durable and low-maintenance option that is resistant to rot, insect damage, and warping. However, it can be more expensive than wood and may not be as flexible in terms of customization.
PVC
PVC decking is made from a single piece of plastic and is a low-maintenance option that does not require any painting or staining. It is also resistant to rot, insect damage, and warping. However, it can be more expensive than wood or composite and may not be as flexible in terms of customization.
Ultimately, the best decking material for your deck will depend on your specific needs and preferences. It’s important to consider factors such as cost, maintenance requirements, and customization options before making a decision.
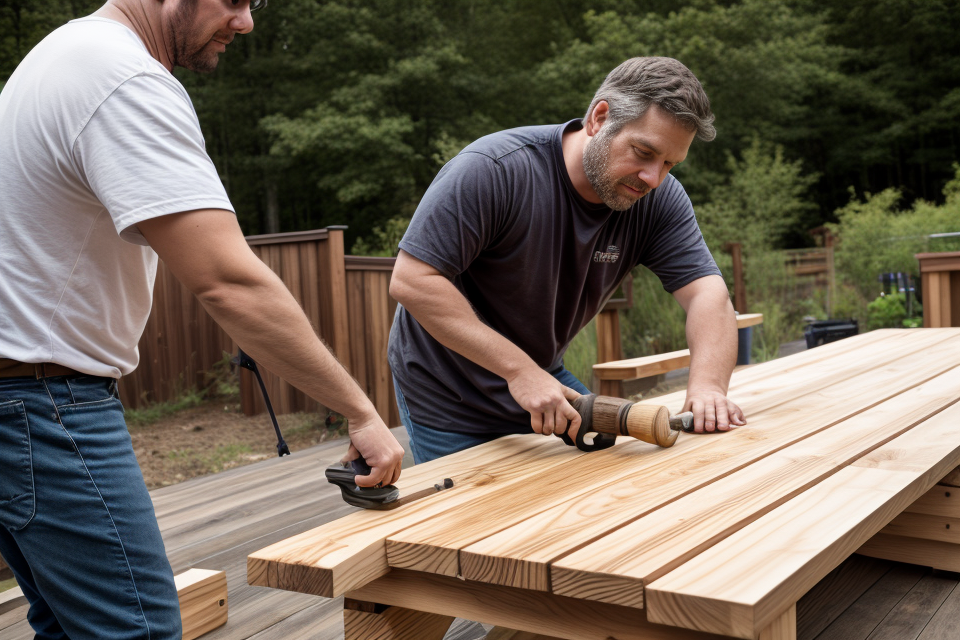
Lay the Decking Boards
When it comes to laying the decking boards, there are a few key things to keep in mind to ensure a professional-looking finish.
First, it’s important to start at the corner of the deck and work your way out towards the center. This will help to minimize any gaps or overlaps between the boards.
Next, make sure to stagger the board ends, so that the end of one board is not directly on top of the end of another board. This will help to create a more natural and random pattern, rather than a straight line of boards.
It’s also important to keep the boards level as you lay them, using a spirit level or other tool to ensure that they are all the same height. This will help to create a smooth and even surface, and will make the deck look more professional.
When laying the boards, it’s a good idea to use a mallet or other tool to tap them into place, rather than using nails or screws. This will help to prevent the boards from moving or shifting over time, and will give the deck a more solid and durable finish.
Overall, by following these simple tips, you can ensure that your deck looks professional and well-built, and will be able to withstand the test of time.
Install Railings
When it comes to building a deck, installing railings is an essential step that should not be overlooked. Railings not only provide safety but also add a decorative touch to your deck. Here are some steps to follow when installing railings for your deck:
- Measure the length and height of your deck: Before you start installing railings, you need to measure the length and height of your deck. This will help you determine the number of railing sections you need to purchase.
- Choose the right material: There are various materials to choose from when it comes to deck railings, including wood, metal, and vinyl. Each material has its own set of advantages and disadvantages, so it’s important to choose one that suits your needs and budget.
- Prepare the posts: Before installing the railings, you need to prepare the posts. This involves digging holes for the posts and setting them in concrete. Make sure the posts are level and plumb before attaching the railings.
- Attach the railings: Once the posts are ready, you can start attaching the railings. Start at one end of the deck and work your way towards the other end. Use screws or nails to secure the railings to the posts.
- Add a top rail: Finally, add a top rail to the top of the railings. This will give your deck a finished look and provide additional safety.
In summary, installing railings is an important step when building a deck. Measure the length and height of your deck, choose the right material, prepare the posts, attach the railings, and add a top rail. By following these steps, you can ensure that your deck is safe and looks great.
Step 6: Finish and Maintain Your Deck
Install Post-to-Post Deck Railings
After completing the construction of your deck, the final step is to install post-to-post deck railings. This step is crucial in providing safety to the users and also adding aesthetic value to the deck.
Here are the steps involved in installing post-to-post deck railings:
- Measure the length and height of the railing: The first step is to measure the length and height of the railing. The height of the railing should be between 36 and 42 inches from the deck surface. The length of the railing should be the same as the length of the deck.
- Cut the railings to size: After measuring the length and height of the railing, the next step is to cut the railings to size. The railings should be cut to the exact length and height as measured in the previous step.
- Attach the railings to the posts: The next step is to attach the railings to the posts. This can be done by using screws or brackets. The railings should be attached to the posts at a height of 36 to 42 inches from the deck surface.
- Install the top rail: The final step is to install the top rail. This can be done by attaching the top rail to the top of the posts using screws or brackets.
It is important to ensure that the railings are installed correctly to provide safety to the users and also to comply with local building codes.
Install Top Railings
After the deck is constructed and all the necessary safety measures are in place, it’s time to install top railings. Top railings are an essential component of a deck as they provide a protective barrier, ensuring that users are safe from falls. In addition, they also enhance the aesthetic appeal of the deck, giving it a polished and complete look.
Here are the steps to follow when installing top railings:
- Measure the length and height of the deck: Before installing the top railings, it’s important to measure the length and height of the deck to ensure that the railings will fit properly.
- Choose the right material: There are various materials to choose from when installing top railings, including wood, metal, and vinyl. Choose a material that is durable, weather-resistant, and fits the overall aesthetic of the deck.
- Cut the railing to size: Once the material has been chosen, it’s time to cut the railing to size. Use a saw to cut the railing to the desired length, ensuring that it fits the deck perfectly.
- Install the railing: Installing the railing is a multi-step process. First, attach the railing to the deck using screws or bolts. Then, attach the top rail to the top of the railing posts, ensuring that it is level and secure. Finally, attach the bottom rail to the bottom of the railing posts, creating a sturdy and secure barrier.
- Add decorative elements: Once the top railings are installed, it’s time to add decorative elements to enhance the aesthetic appeal of the deck. This can include adding balusters, adding a top cap, or adding a decorative trim.
By following these steps, you can ensure that the top railings are installed properly, providing a safe and visually appealing barrier for your deck.
Finish Your Deck
The finishing touches are crucial to creating a beautiful and long-lasting deck. To finish your deck, you will need to:
- Clean the deck thoroughly to remove any dust, debris, or dirt. This will ensure that the finish looks its best and will last longer.
- Apply a sealant or finish to protect the wood from the elements. There are many different types of sealants and finishes available, including oil-based, water-based, and spray-on options. It is important to choose a high-quality product that is designed for outdoor use and will provide long-lasting protection.
- Apply the sealant or finish evenly, following the manufacturer’s instructions carefully. It is important to apply the finish in a consistent manner to ensure that the deck looks uniform and professional.
- Allow the finish to dry completely before using the deck. This will ensure that the finish is fully cured and will not be damaged by foot traffic or other use.
By following these steps, you can ensure that your deck is finished to a high standard and will be protected from the elements for years to come.
Maintain Your Deck
Maintaining your deck is an essential step in ensuring its longevity and beauty. Neglecting maintenance can lead to costly repairs and a shorter lifespan for your deck. Here are some key maintenance tasks to keep in mind:
Clean Your Deck Regularly
Dirt, dust, and debris can accumulate on your deck over time, making it look dull and dirty. Regular cleaning will help remove these contaminants and prevent the growth of mold and mildew. Use a pressure washer or a soft-bristled brush to clean your deck, and be sure to rinse it thoroughly with water.
Stain or Seal Your Deck
Staining or sealing your deck can help protect it from the elements and prevent damage from moisture. Stains come in a variety of colors and can be applied to both wood and composite decks. Sealers are clear or tinted coatings that can be applied to wood decks to provide additional protection. It’s recommended to stain or seal your deck every 1-3 years, depending on the type of material and exposure to the elements.
Inspect Your Deck Regularly
Regular inspections can help identify any issues before they become major problems. Check your deck for any signs of damage, such as cracks, splinters, or rot. Look for signs of mold or mildew growth, and take steps to remove it as soon as possible. If you notice any significant damage, consult a professional deck builder or contractor for repairs.
Repair Any Damage Promptly
Prompt repairs can help prevent further damage and extend the lifespan of your deck. Small repairs, such as filling in nail holes or replacing a few deck boards, can be done with basic tools and materials. However, if you notice significant damage, such as rotting or structural damage, it’s best to consult a professional deck builder or contractor for repairs.
By following these maintenance tips, you can ensure that your deck stays beautiful and functional for years to come.
Step 7: Inspect and Finalize
Inspect Your Deck
Inspecting your deck is a crucial step in the building process, as it allows you to identify any issues or defects that may have occurred during construction. It is recommended to inspect your deck once it has been completed and before any furniture or accessories are placed on it.
During the inspection, you should look for any signs of damage, such as cracks, warping, or rotting. You should also check for proper drainage and ensure that all nails and screws are properly concealed.
If you notice any defects, it is important to address them immediately to prevent further damage. Depending on the severity of the issue, you may need to repair or replace the affected areas.
Additionally, inspecting your deck can help you identify any areas that may need additional maintenance or protection, such as sealing or staining. This will help to extend the life of your deck and prevent future damage.
Inspecting your deck is also an opportunity to ensure that it meets all building codes and regulations. Your local building department can provide guidance on what codes and regulations apply to your deck, and can inspect your deck to ensure compliance.
Overall, inspecting your deck is a critical step in the building process, as it allows you to identify and address any issues before they become more serious problems. By taking the time to inspect your deck, you can ensure that it is safe, durable, and meets all building codes and regulations.
Address Any Issues
Once you have completed the construction of your deck, it is important to inspect it thoroughly to ensure that there are no issues or defects that need to be addressed. Here are some steps you can take to address any issues:
- Look for any signs of damage or wear and tear, such as cracks, warping, or rotting.
- Check for any loose or unsecured components, such as nails, screws, or bolts.
- Look for any areas where water may be penetrating, such as around posts or under the deck.
- Check for any unevenness or sagging in the deck surface.
If you identify any issues, it is important to address them promptly to prevent further damage or safety hazards. Depending on the severity of the issue, you may need to repair or replace damaged components, tighten loose components, or make structural reinforcements. It is recommended to seek the assistance of a professional deck builder or contractor to address any complex or serious issues.
Properly addressing any issues before finalizing your deck construction can help ensure that your deck is safe, durable, and visually appealing for years to come.
Finalize Your Deck
Once you have completed the construction of your deck, it is important to inspect it thoroughly to ensure that it is safe and structurally sound. Look for any signs of damage or wear and tear, such as cracked or warped boards, loose nails or screws, or movement between the deck and the house. If you notice any issues, make the necessary repairs before proceeding.
Once you have inspected your deck and made any necessary repairs, it is time to finalize it. This includes adding any finishing touches, such as railings, decorative accents, or outdoor lighting. These elements can help to enhance the appearance of your deck and create a more functional and enjoyable outdoor living space.
When it comes to railings, you will need to choose a style that complements the overall design of your deck and provides adequate safety features. Consider the height of the railing, the type of material used, and the spacing between the rails and posts. You may also want to consider adding a gate or access point for easy access to your deck.
In addition to railings, you may also want to consider adding decorative accents, such as planters or outdoor furniture. These elements can help to personalize your deck and create a more inviting and comfortable outdoor space. You may also want to consider adding outdoor lighting, such as string lights or solar-powered lights, to enhance the ambiance and safety of your deck at night.
Overall, finalizing your deck involves adding any finishing touches and ensuring that it is safe and functional. By taking the time to inspect and repair any issues, choosing the right railings and decorative accents, and adding outdoor lighting, you can create a beautiful and comfortable outdoor living space that you and your family can enjoy for years to come.
FAQs
1. What is the best way to build a deck?
Answer:
The best way to build a deck depends on several factors such as the size of the deck, the type of materials used, the local building codes, and personal preferences. However, a common approach is to start by preparing the site, laying the deck’s foundation, framing the deck, attaching the deck to the house, adding railings, and finally, finishing the deck with decking material, paint or stain. It’s also recommended to consult with a professional deck builder or local building department for specific guidance.
2. What materials should I use to build a deck?
The choice of materials for building a deck depends on personal preferences, climate, and budget. Common materials include wood, composite, plastic, and metal. Wood is a popular choice due to its natural look and feel, but it requires regular maintenance. Composite materials are made from a combination of wood and plastic and require less maintenance. Plastic and metal are low-maintenance options but may not have the same aesthetic appeal as wood. It’s important to consider the pros and cons of each material before making a decision.
3. How do I prepare the site for building a deck?
Preparing the site for building a deck involves clearing the area, leveling the ground, and ensuring that the deck is properly anchored to the house. The ground should be cleared of any debris, vegetation, and loose material. The area should be leveled using a transit and a grade rod. The deck should be properly anchored to the house to ensure stability and prevent movement. It’s also important to consider drainage and ensure that water flows away from the deck.
4. What are the local building codes for deck construction?
Local building codes vary depending on the location and the size of the deck. It’s important to consult with the local building department to determine the specific requirements for deck construction. Typically, decks must be properly anchored to the house, have adequate footings, and meet minimum height requirements. Railings are also required for decks above a certain height. Failure to comply with building codes can result in fines and unsafe conditions.
5. How do I finish my deck?
Finishing a deck involves applying a decking material, paint, or stain. Decking materials include wood, composite, plastic, and metal. It’s important to choose a material that is suitable for the climate and personal preferences. Paint or stain can be applied to enhance the appearance of the deck and provide protection against the elements. It’s recommended to apply multiple coats and allow the material to cure before using the deck.
Easiest Deck Build Ever | Step By Step
https://www.youtube.com/watch?v=9aR8h_TgRss